This is the second article in a series on Game Project Management. In the last article, First Project – 2D Map Editor In Cocoa for Mac OS X, I went over the steps that will be required to complete my first game development project for the site. In this post, I’ll be talking about the design of my Map Editor.
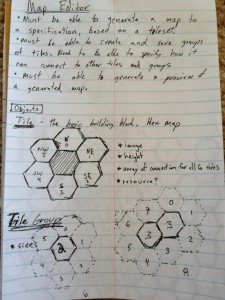
I’m pretty old school when it comes to design and I tend to use pen/pencil and paper to get my ideas down. I find that this is much more effective than me staring a blank computer screen. There is something about the handwritten aspect of journaling my ideas that I enjoy. It also allows me to do lots of drawing, which you’ll see in the design documents in this post. The first step was coming up with a bullet point list of the must haves for my projects:
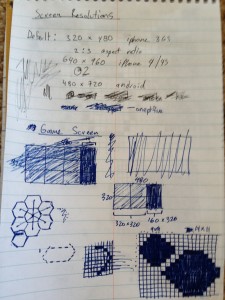
In this initial session, I quickly determined that I wanted to use a Hex Map in the design of my tile based game engine. Hex maps have been around since the 1950s and provide the advantage of being able to move in six directions instead of four, with each direction being equal distance from each other. It also allows artists to more easily give the illusion of 3D and perspective using a 3/4 overhead view. I was very interested in how I would be able to create tile groups to allow me to connect together objects on a map. I did some initial drawings to confirm that this was the map scheme I wanted to use:
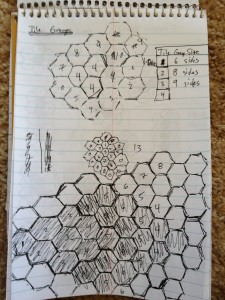
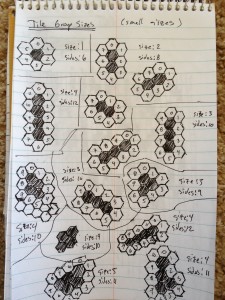
My trial design looked good, so now I needed to get a better idea of how many sides would be connected for each size. This is difficult because the size doesn’t necessarily determine the number of sides, the shape does. I decided to make a comprehensive list of the small size tile groups that I would be using in my project:
This was an excellent visual representation for me and showed me some of the numerical aspects (size and sides) for each tile group. Now that I had a visual list, I wanted to get a graphical representation of the small size tile groups for sizes one through four:
At this point, I was happy with my tile group designs and figured I’d be able to extend the design to any additional required functionality that I might need. The next step was determining the size of the map, as well as the resolution. I didn’t know much about the resolutions for mobile devices, but this article on iPhone screen resolutions and dpi was a great resource. I learned that I’m going to need to build my app to be 320×480 (or in my case 480×320 since I plan on running in a fixed horizontal mode). The problem is that the iPhone 4/4S run at 640×960 and Android runs at 480×720. The solution seems to be the API I plan on using to develop the game – Corona. This API lets you create games in Lua and port them to iPhone, Android, Kindle Fire, and Nook. Exactly what I’m looking for! Not only that, they already have built in support for running games at multiple resolutions using custom higher resolution image filenames.
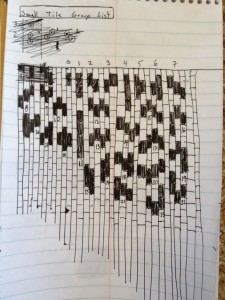
Now that I knew what resolution I was working with, I needed to determine the size of a single tile. For this, I started drawing up some designs:
I came up with a decent design that would tile together at 14×11 pixels, but I wasn’t happy with the overall size. I wanted to have a smaller base tile, ideally as small as I could possibly get. I kept iterating on the basic tile pixel design:
I came across a page with 33×27 pixel hex map design that looked promising, however it looked a little jagged and was too big. In the end, it seemed like just two of my design prototypes were viable: 4×4 and 8×8 crosses that stitched together nicely but gave me the hex map design I wanted. I opted to use the 4×4 tile map because it was the smallest size that would work (3×3 cross overlaps).
Now that I had the size of the basic tile, I had to determine the size of the map. In this case, I wanted to use 2/3 of the screen for the map – creating a square 320×320 presentation area. This can easily be broken down into 80 tiles; however, because of the cross structure, the corners need an additional two tiles to cover them, leaving an 82×82 tile map. This will be my proof of concept – 82×82 one screen. From there, I’d like to create sizes up to 10×10 screens or 820×820 tiles. Making the map size rectangular will allow for narrow vertical or long horizontal maps. My designs for the map sizes are below:
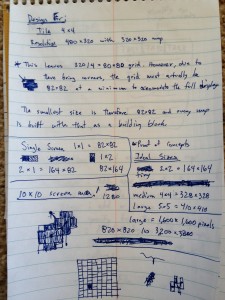
This is the final set of design specifications for the Map Editor: including screen, map, and tile sizes.
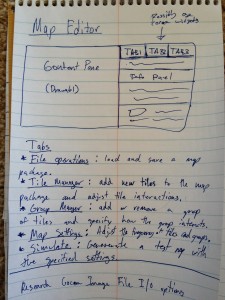
The last component of the Map Editor design to be worked out is the actual app itself. The layout of the app is important because I need to be able to achieve a variety of tasks from the same basic user interface design. I came up with the following:
The content pane is where you will be able to see a visual representation of whatever tab is currently selected. The info panel is where you can adjust settings for the selected tab and view your results in the content page. Pretty simple design since I’m a beginner with Cocoa.
There you have it – the complete Map Editor design documents and process. I hope this was helpful and you’ll continue to track my progress in the next article for the Game Project Management Series: Part Two – Research the Cocoa API.
